 Respeak Text via SpeakTitle Window
Speech input is only available in Wincaps Q4 Pro/Q-Live
In this article:
Overview
This topic describes how to respeak text via the SpeakTitle Window, located at the bottom of the List View. In this mode, all interaction between Wincaps Q4 and the speech software takes place through the SpeakTitle Window.
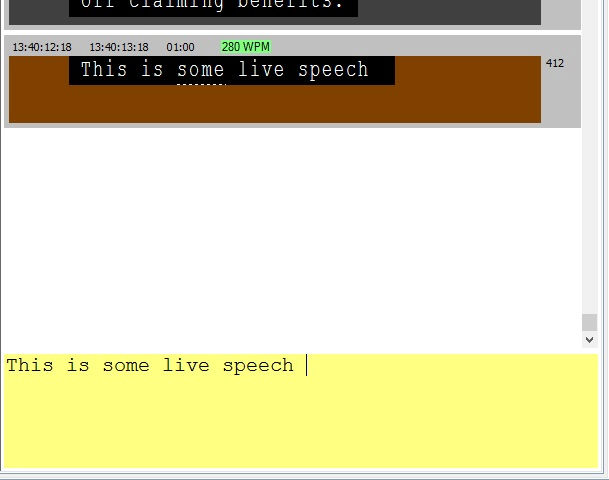
When the SpeakTitle Window has focus, its background colour changes to yellow for visibility.
![]() Before using speech input via SpeakTitle, you should ensure that your speech engine is installed and working correctly. You can check this by respeaking some text into Windows Notepad.
Before using speech input via SpeakTitle, you should ensure that your speech engine is installed and working correctly. You can check this by respeaking some text into Windows Notepad.
The general procedure for entering spoken text via the SpeakTitle Window is as follows.
-
Check that automatic text splitting is toggled on via the
 button located on the file toolbar or via the Ctrl L keystroke
 -
Select the subtitle where the newly re-spoken text should appear
-
Give the input focus to the SpeakTitle Window
-
Activate the microphone and begin speaking. After a short pause, the spoken text will start to appear in the SpeakTitle window. You will also see it appear in the current subtitle. At this stage the text is buffered, allowing you to review and correct any errors before committing the text to the file.
-
When the buffer is full (or when you trigger a deliberate newline), Wincaps Q4 splits the current buffer of text, possibly creating several new subtitles in the process. The buffer is then cleared so you can start inputting the next run of text.
You can use the keyboard to correct the text in the SpeakTitle window at any time before it is committed to the file.
A limited set of keyboard commands are available whist the SpeakTitle window has focus. You can use PageUp and PageDown to change the current subtitle. Full keyboard control of the video is also provided. You can use the normal keystrokes to change the position of the spoken text, including raising the subtitle. It is not possible to change justification when the SpeakTitle Window has focus.
You can use the normal keystrokes to change the foreground colour of the spoken text. If you do so, the colour change will change immediately in the file using the standard colour changing functionality. It is not possible to change the background colour when the SpeakTitle Window has focus.
If you use the macro hash commands to change the foreground text colour they will take effect immediately.
If the Line break on colour option is enabled, Q4 automatically inserts line breaks whenever the foreground colour changes. This ensures that the text for each speaker is placed on a new line.
HouseStyles
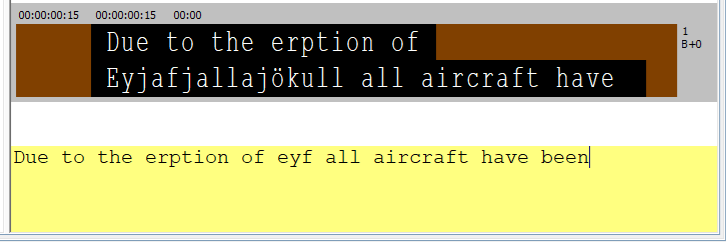
If you are using House Styles, you will see the substitutions being made as you speak. The replacement text will appear once the last word of the House Style plus a space has been entered, or when you press the Return key or use the #sendsubtitle macro.
By default the housestyle expansion will be seen in the subtitle file and not in the SpeakTitle Window as below:
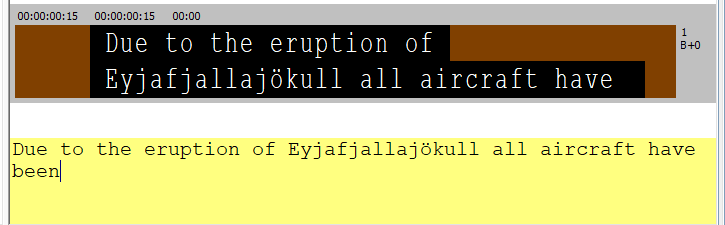
If the Show HouseStyle expansion in SpeakTitle Window option is ticked then the expansion can be seen in the SpeakTitle Window as well.
SpeakTitle Window Settings
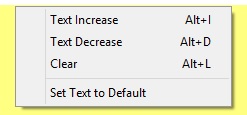
It is possible to alter the size of the text in the SpeakTitle window if required. Right click or use Alt+I to increase or Alt+D to decrease.
Text can also be cleared from the SpeakTitle Window using the Right click 'Clear' option or Alt+L.
Speech input with the Aligner
The procedure for creating and timing subtitles using speech input in conjunction with the Aligner is as follows:
In the List View, select the subtitle where the new text should be created (normally the last subtitle in the file). Set the input focus to the SpeakTitle Window. Check that automatic text splitting is toggled on and that the Aligner is enabled. You are now ready to begin.
-
Pause the media just before start of the speech for the section and create a section start marker (i.e. press the SectionStart (Ins) key or say the #sectionstart macro)
-
Speak and/or type in the text for the section, using #sendsubtitle or Return if required to split the subtitles. If you don't use Return, the system will automatically split the text at appropriate points.
-
Pause the media just after the end of speech for the section and press Return or say the #sendsubtitle macro in order to split it. The system will split the text and leave you on a new blank subtitle.
-
Create a section end marker (i.e. press the SectionEnd (Del) key or say the #sectionend macro. The system will put a section end marker after the last subtitle that contains text. The Aligner will automatically run in the background to align the section.
-
Pause the media just before start of the speech for the next section and create a section start marker (i.e. press the SectionStart (Ins) key or say the #sectionstart macro).
-
Continue as of step 2 above
OPTION - Auto-insert section start marker: Wincaps Q4 provides a user option that will automatically create a new section start marker whenever you create a new section end marker at the end of the file. If this option is enabled, Wincaps Q4 will automatically attach a new section start marker to the next (blank) subtitle. The timecode of the new section start marker will be the same as the previous section end marker, i.e. the new section will follow on immediately. Enabling this option may be more efficient for certain types of workflow. Note that this option only applies when you are entering text via the SpeakTitle Window. With the option enabled, the modified workflow is as follows:
-
Pause the media just before start of the speech for the section and create a section start marker (i.e. press the SectionStart (Ins) key or say the #sectionstart macro)
-
Speak and/or type in the text for the section, using #sendsubtitle or Return if required to split the subtitles. If you don't use Return, the system will automatically split the text at appropriate points.
-
Pause the media just after the end of speech for the section and press Return or say the #sendsubtitle macro in order to split it. The system will split the text and leave you on a new blank subtitle.
-
Create a section end marker (i.e. press the SectionEnd (Del) key or say the #sectionend macro. The system will put a section end marker after the last subtitle that contains text and a section start marker on the new blank subtitle. The Aligner will automatically run in the background to align the previous section.
-
If needed, pause the media just before start of the speech for the next section and update the position of the section start marker (i.e. press the SectionStart (Ins) key or say the #sectionstart macro). This is recommended if there is a gap of more than a few sections in the speech, otherwise you can skip this step.
-
Continue as of step 2 above