Commercial Installer Commercial Installer
There are two licencing options for the main commercial installer:
The installer gives the administrator the option to use ether standalone or network during the installation process.
There are specific pre-requirements for the Wincaps installation, these are in System Information.
The installer also gives the administrator the option to install the Q4 and Q-Live clients, Q-News, Q-Live services, Video Indexer and the ASR components.
The installer will also install Medialooks Multiformat for video playback and from 4.43 onwards; Dot Net 4.8 (if not previously installed) and from 4.44 onwards, dot net 5, if not previously installed, for the commercial installer; Wincaps_x.xx.x_Installation_Setup.exe.
The commercial installation file is called Wincaps_x.xx.x_Installation_Setup.exe. Up to 4.42.6 the installation file was called Wincaps Installation Setup.exe.
The user running the installation must have full administrator rights on the local machine.
Install the new client using the exe installer.
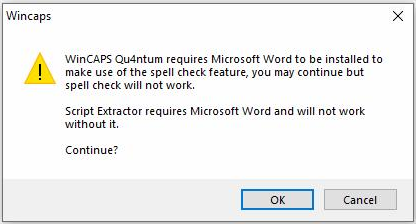
If Microsoft Word is not installed on the PC a message will appear before the main installation process:
Follow the on screen instructions to move to the licencing option dialog.
The installer licencing option will default to standalone during the installation process:
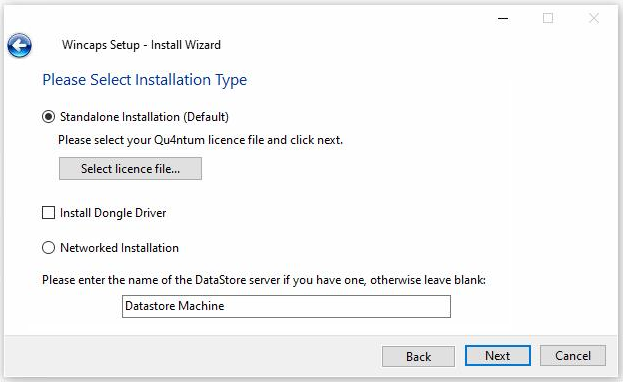
If you have been sent a licence TXT file, place this on the desktop and press the Select licence file... button. This will open a File Explorer dialog for the desktop. Scroll to the licence file and press OK.
If the licence file is locked to a dongle, do not plug the dongle in at this stage, tick the Install Dongle Driver option and this will install the dongle drivers. The dongle should then be installed at the end of the Wincaps installation process.
The Datastore server field is typically blank for a standalone PC and the Datastore operates as a local datastore which doesn't have any editing capabilities.
Ticking the Networked Installation option reveals the licence server field:
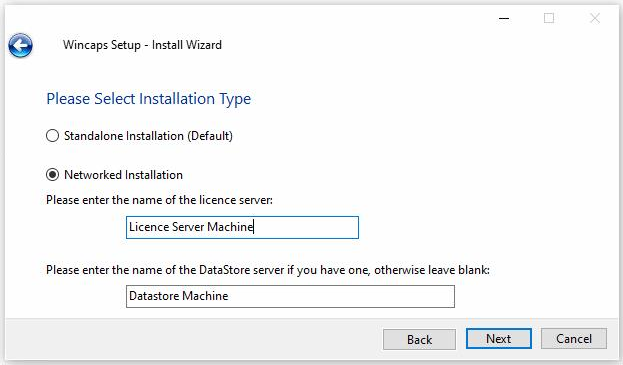
Enter the name or IP address of the licence server in the licence server field. When the licence server has configured, any licences available on the licence server will be visible to the Q4 or Q-Live client.
Enter the name or IP address of the Datastore service if there is one installed.
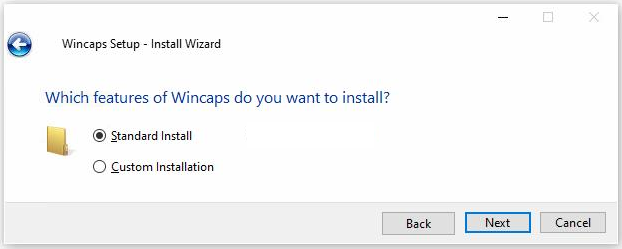
By default, the Wincaps installer will be set to Standard Install which will install Q4, DVD Builder and Screener.
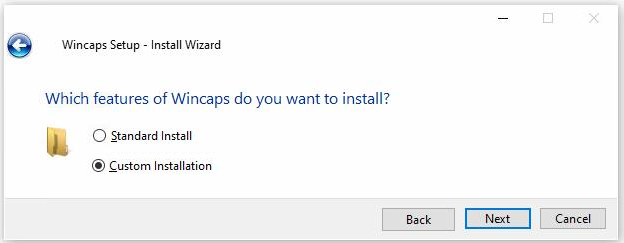
If anything other than Q4 is required, then the Custom Installation option should be ticked:
The list of Features is as below and should be managed by an Administrator.
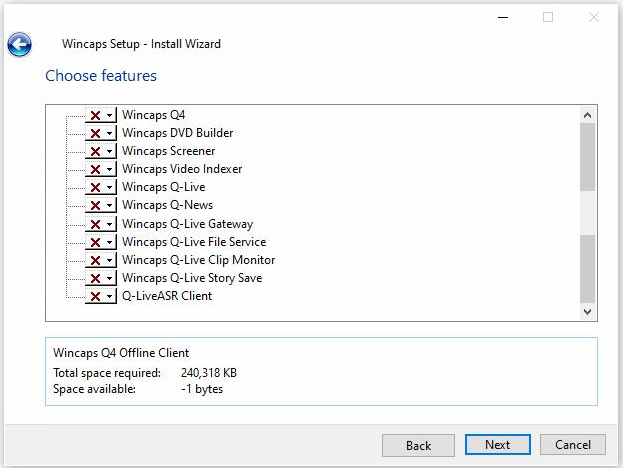
Wincaps Q4 Wincaps offline subtitle creation, editing, translation and file output system.
Wincaps DVD Builder Format building application. Speak to BroadStream support for more information.
Wincaps Screener low-res WMV subtitle burn in for Mpeg-1 and WMV input only. Speak to BroadStream support for more information.
Wincaps Video Indexer Separate video indexing service to create Wincaps helper files. Speak to BroadStream support for more information.
Wincaps Q-Live Wincaps live subtitling system.
Wincaps Q-News Newsroom integration system. This requires a separate licence.
Wincaps Q-Live Gateway Output device management and output service.
Wincaps Q-Live File Server File management service for multi-user editing in Q-Live.
Wincaps Q-Live Clip Monitor Automatic iNEWS video clip association service. The details are configured in Q-News allowing an iNEWS video clip from the media management folder to be associated to the relevant Story in Q-Live.
Wincaps Q-Live Story Save Q-Live Story export service. When a Story is marked as Complete it will be exported to the chosen file format.
Q-LiveASR Client Q-LiveASR output conversion. Coverts the output from Q-LiveASR into text for input to Q-Live for editing and output.
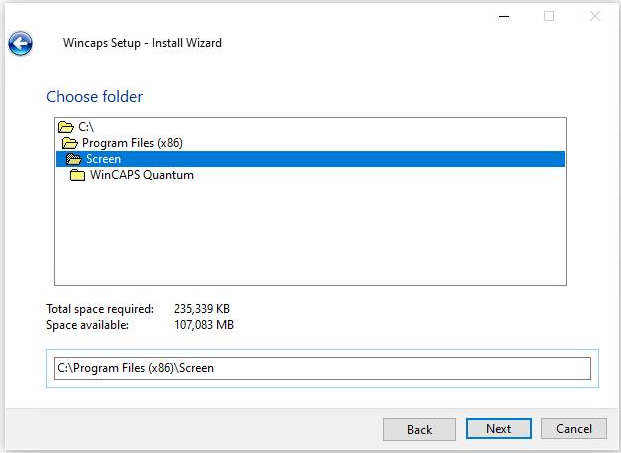
Configures the location on the PC/Server for the Wincaps components. Defaults to C:\Program Files (x86)\Screen
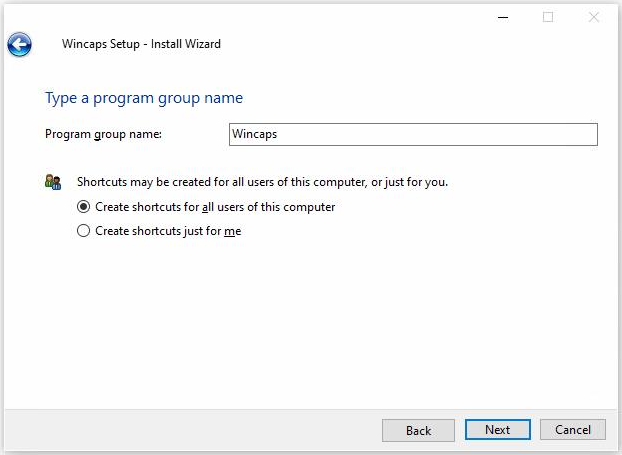
The Program Group can be configured here and defaults to Wincaps. The shortcut configuration options can be set up here.
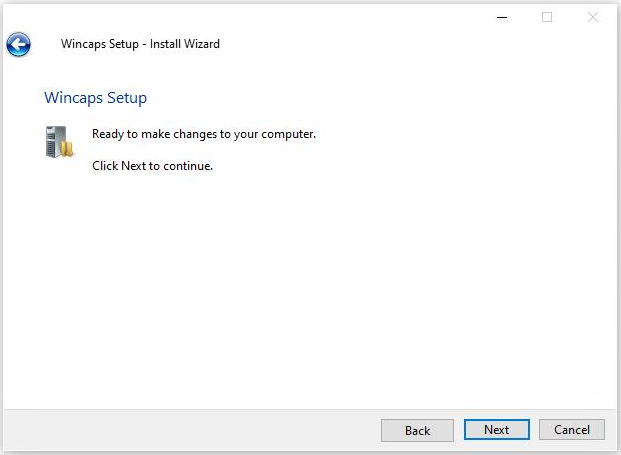
This is the final check before installation begins. If there are any changes that may not have been made, this is the last chance to go Back and make the changes. Pressing Next on the below dialog starts the installation process.
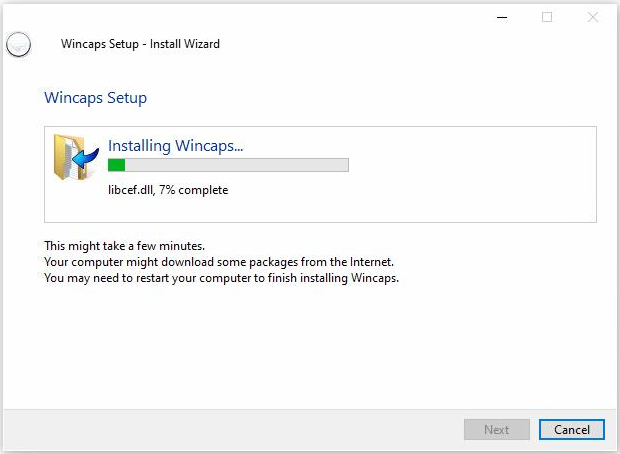
Wincaps installation progress bar will display below. Any packages, such as DotNet versions and Medialooks Multiformat will be installed as part of the installation.
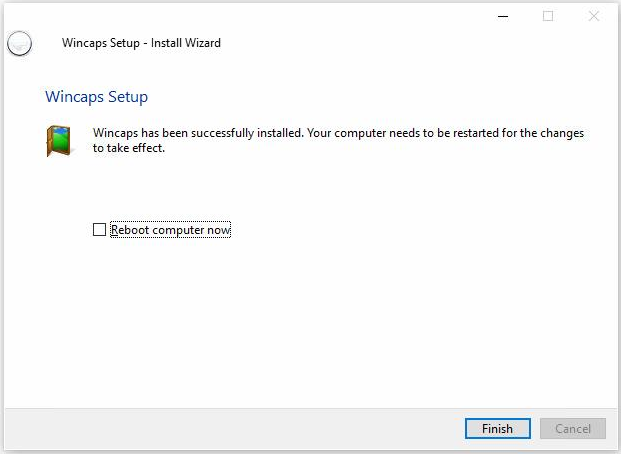
When the installation is complete the below dialog appears. If required, and for any Q-Live Service installations we would recommend this being done, the PC/Server can be rebooted by ticking/enabling the 'Reboot computer now' option followed by Finish.